The Simplest Yocto Build on Raspberry Pi
Setting up a Yocto (Poky) build from scratch always turns up a handful of sharp edges, even when you know your way around embedded Linux. Here’s how I bootstrapped a Scarthgap LTS image for a Raspberry Pi 4B, the hardware and BIOS decisions behind the setup, and the pitfalls worth knowing before you hit them yourself.
If you want the deeper dive, I walk through this build in more detail on YouTube: Yocto Project - a practical walkthrough.
A Quick Glossary
Yocto isn’t a ready-made distro - it’s a framework for building your own, tightly scoped Linux distribution. A few terms worth being precise about:
- Yocto Project - the overarching framework and tooling for building embedded Linux systems.
- OpenEmbedded - the build system underneath Yocto: the metadata and tooling Yocto itself is built on.
- BitBake - the engine that drives everything. It parses recipes, resolves dependencies, and compiles the whole system from source.
- Layers (
meta-*) - Yocto’s modular building blocks. Layers add functionality (meta-python) or hardware support without touching the core. - BSP (Board Support Package) - a layer with the drivers, kernel config, and boot files for a specific board - in this case, the Raspberry Pi.
The Goal: Yocto for Raspberry Pi 4B
The target was clear: a Yocto Scarthgap LTS image for a Raspberry Pi 4B.
Hardware and BIOS Decisions
I initially considered a MacBook Air M4, but ARM64 toolchain quirks and passive cooling under a sustained BitBake build made a PC host the better call: AMD Ryzen 7 3700X, 32 GB RAM.
The VMware VM got 6 cores, 24 GB RAM, and 300 GB of SSD - Yocto is a serious disk-space consumer, and under-provisioning it just means restarting builds later. Before the VM would even boot properly, hardware virtualization needed enabling in the BIOS: SVM Mode (AMD-V) on the Gigabyte X570 Aorus Elite, without which a VM has no direct access to the CPU’s virtualization extensions.
First Steps in Ubuntu 24.04 - and the Pitfalls Worth Knowing
- The
git://protocol block - my home ISP was silently blocking the port this protocol uses. The fix: switch to the official GitHub mirrors and pull everything over HTTPS instead. - Layers - three sources, pulled cleanly once the protocol issue was sorted:
poky- the reference base, shipping BitBake itself and the minimal recipes needed to build Linux.meta-raspberrypi- the BSP layer: kernel config, drivers, and boot files for the 4B.meta-openembedded- specificallymeta-oe(extra system recipes other layers depend on),meta-python(a hard dependency once multimedia support came into play), andmeta-multimedia(codecs, players, audio/video libraries).
- AppArmor vs. Ubuntu 24.04 - the first BitBake run failed on a “user namespaces” security error. Fixed with a kernel setting via
sysctl. - Layer ordering and dependencies -
meta-multimediadeclaresmeta-pythonin itsLAYERDEPENDS.bitbake-layers add-layerchecks that at add time, so trying to registermeta-multimediabeforemeta-pythonis already inbblayers.conffails outright - the fix is just callingadd-layerin the right order. - systemd and usrmerge - BitBake refused to build
core-image-minimaluntil theusrmergeflag was enabled inlocal.conf, a requirement of the modern systemd service manager.
The Build
With every requirement satisfied, bitbake core-image-minimal finally kicked off. I left BB_NUMBER_THREADS and PARALLEL_MAKE on BitBake’s auto-detected defaults (6, matching the VM’s vCPU count) rather than tuning them by hand. The Ryzen 7 went to full throttle, parsing over 2,600 recipes and compiling a clean, purpose-built Linux - kernel 6.6 via the linux-raspberrypi recipe - from source in just over an hour.
Command Log
1
2
3
4
5
6
7
8
9
10
11
12
13
14
15
16
17
18
19
20
21
22
23
24
25
26
27
28
29
30
31
32
33
34
35
36
37
38
39
40
41
42
43
44
sudo apt update && sudo apt upgrade -y && sudo apt install -y \
  gawk wget git diffstat unzip texinfo gcc-multilib build-essential \
  chrpath socat cpio python3 python3-pip python3-pexpect xz-utils \
  debianutils iputils-ping python3-git python3-jinja2 python3-subunit \
  zstd liblz4-tool file locales libsdl1.2-dev libegl1-mesa mesa-common-dev \
  libacl1 xterm tmux \
  dosfstools mtools parted   # required by do_image_wic to build the boot partition

mkdir -p ~/yocto/sources
cd ~/yocto/sources

git clone -b scarthgap https://github.com/yoctoproject/poky.git
git clone -b scarthgap https://github.com/agherzan/meta-raspberrypi.git
git clone -b scarthgap https://github.com/openembedded/meta-openembedded.git

# Fix the AppArmor user-namespace block (Ubuntu 24.04+)
sudo sysctl kernel.apparmor_restrict_unprivileged_userns=0
# to persist across reboots:
echo "kernel.apparmor_restrict_unprivileged_userns=0" | sudo tee /etc/sysctl.d/99-yocto.conf

# Source the build environment
source poky/oe-init-build-env build

# Register the layers - order matters (meta-oe/meta-python before meta-multimedia)
bitbake-layers add-layer ../meta-raspberrypi
bitbake-layers add-layer ../meta-openembedded/meta-oe
bitbake-layers add-layer ../meta-openembedded/meta-python
bitbake-layers add-layer ../meta-openembedded/meta-multimedia

# Target the right machine - edit conf/local.conf
echo 'MACHINE = "raspberrypi4-64"' >> conf/local.conf

# Enable usrmerge for systemd - also in conf/local.conf
echo 'DISTRO_FEATURES:append = " usrmerge"' >> conf/local.conf

# Produce a flashable .wic image alongside the default rpi-sdimg output
echo 'IMAGE_FSTYPES:append = " wic.bz2 wic.bmap"' >> conf/local.conf

# core-image-minimal ships no SSH server and no root password by default -
# debug-tweaks enables passwordless root login over the serial console
echo 'EXTRA_IMAGE_FEATURES:append = " debug-tweaks"' >> conf/local.conf

# Build
bitbake core-image-minimal
Flashing the Image to an SD Card
With the build finished, getting it onto the Pi is the easy part - Raspberry Pi Imager handles it in a few steps:
- Locate your image - in
~/yocto/sources/build/tmp/deploy/images/raspberrypi4-64/, find the file ending in.wic.bz2(e.g.core-image-minimal-raspberrypi4-64.rootfs.wic.bz2). That’s the full disk image you’ll flash. - Download Raspberry Pi Imager - from raspberrypi.com/software for your OS.
- Connect the SD card - insert it into your computer via a card reader.
- Run Imager, choose “Use custom” - under “Choose OS,” select Use custom, then browse to your
.wic.bz2file. Under “Choose Storage,” select your SD card - double-check it’s the right device, since flashing overwrites everything on it. - Flash it - click Write and confirm; Imager erases the card and writes the image.
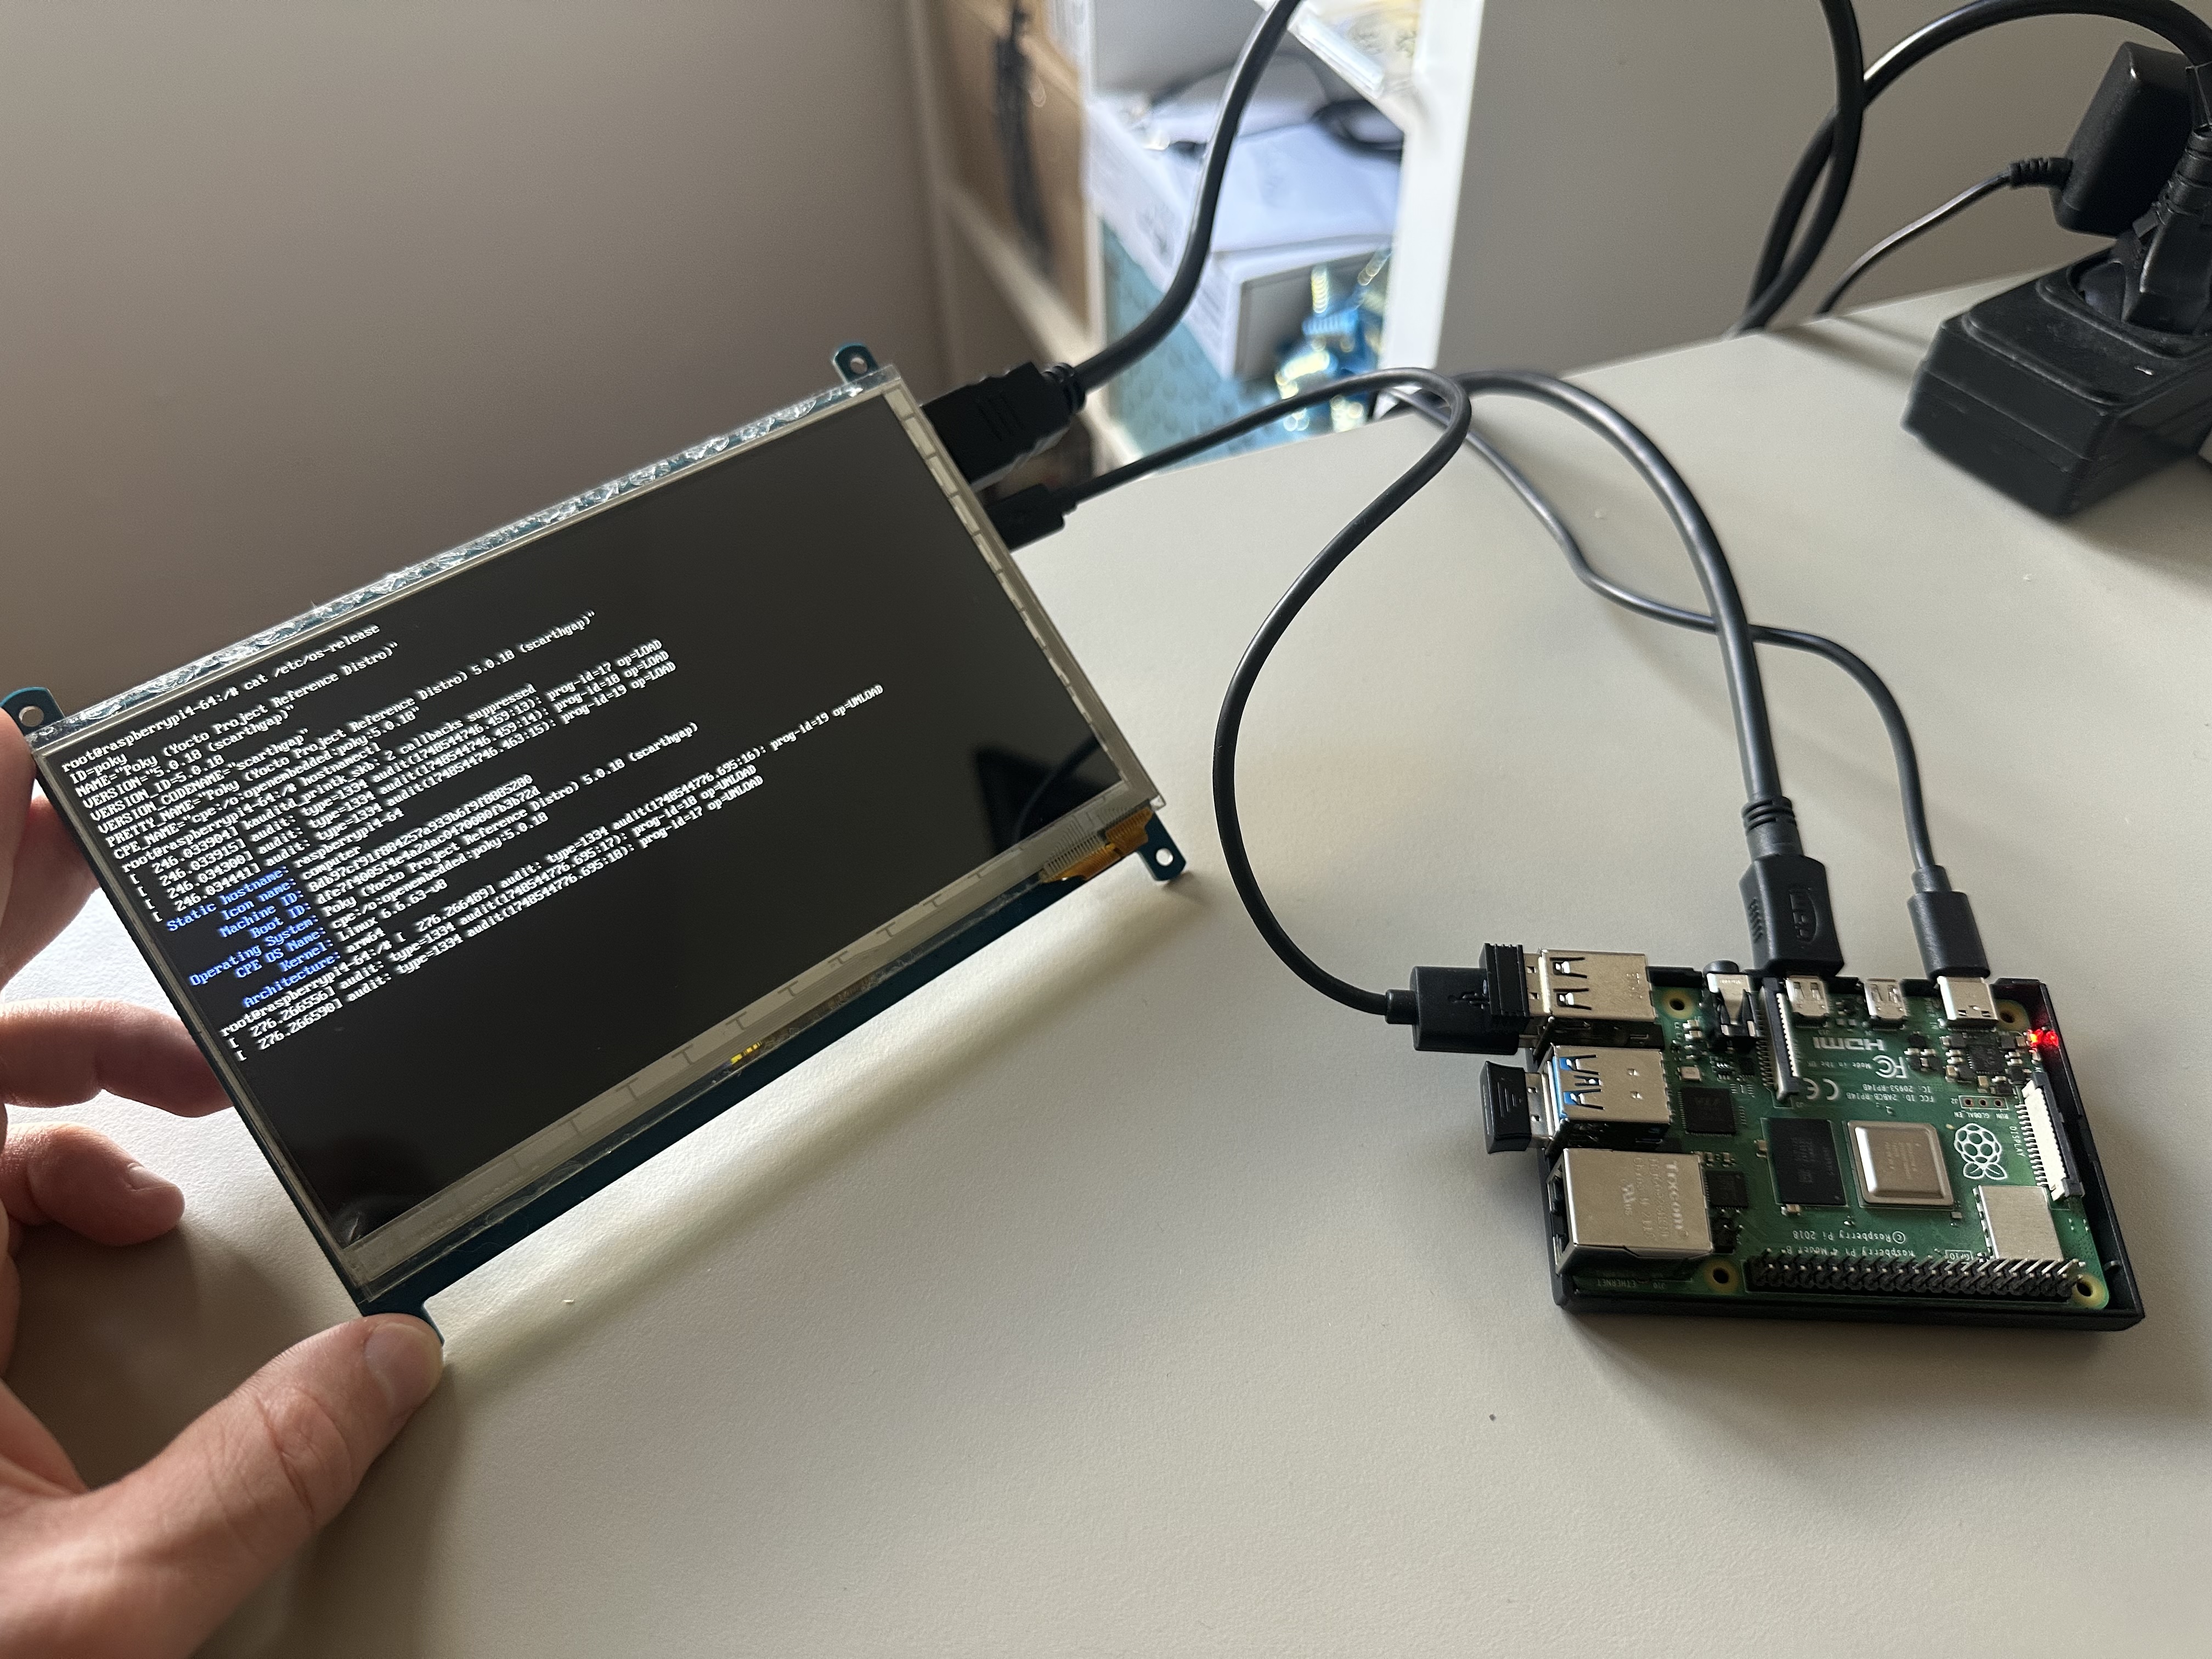
- Boot the Pi - eject the card, insert it into the Raspberry Pi 4B, and power it on.
Connect a keyboard and monitor - thanks to debug-tweaks, you can log in as root with no password once the console prompt appears, and you’re in.
Wrapping Up
Yocto rewards precision - get the layers, dependencies, and kernel settings right, and it gives you full control over exactly what ends up on the board. For the full walkthrough, including the parts that don’t fit neatly into a blog post, check out the video: Yocto Project - a practical walkthrough.