Yocto + Qt6 on Raspberry Pi 4B: Full journey
The goal
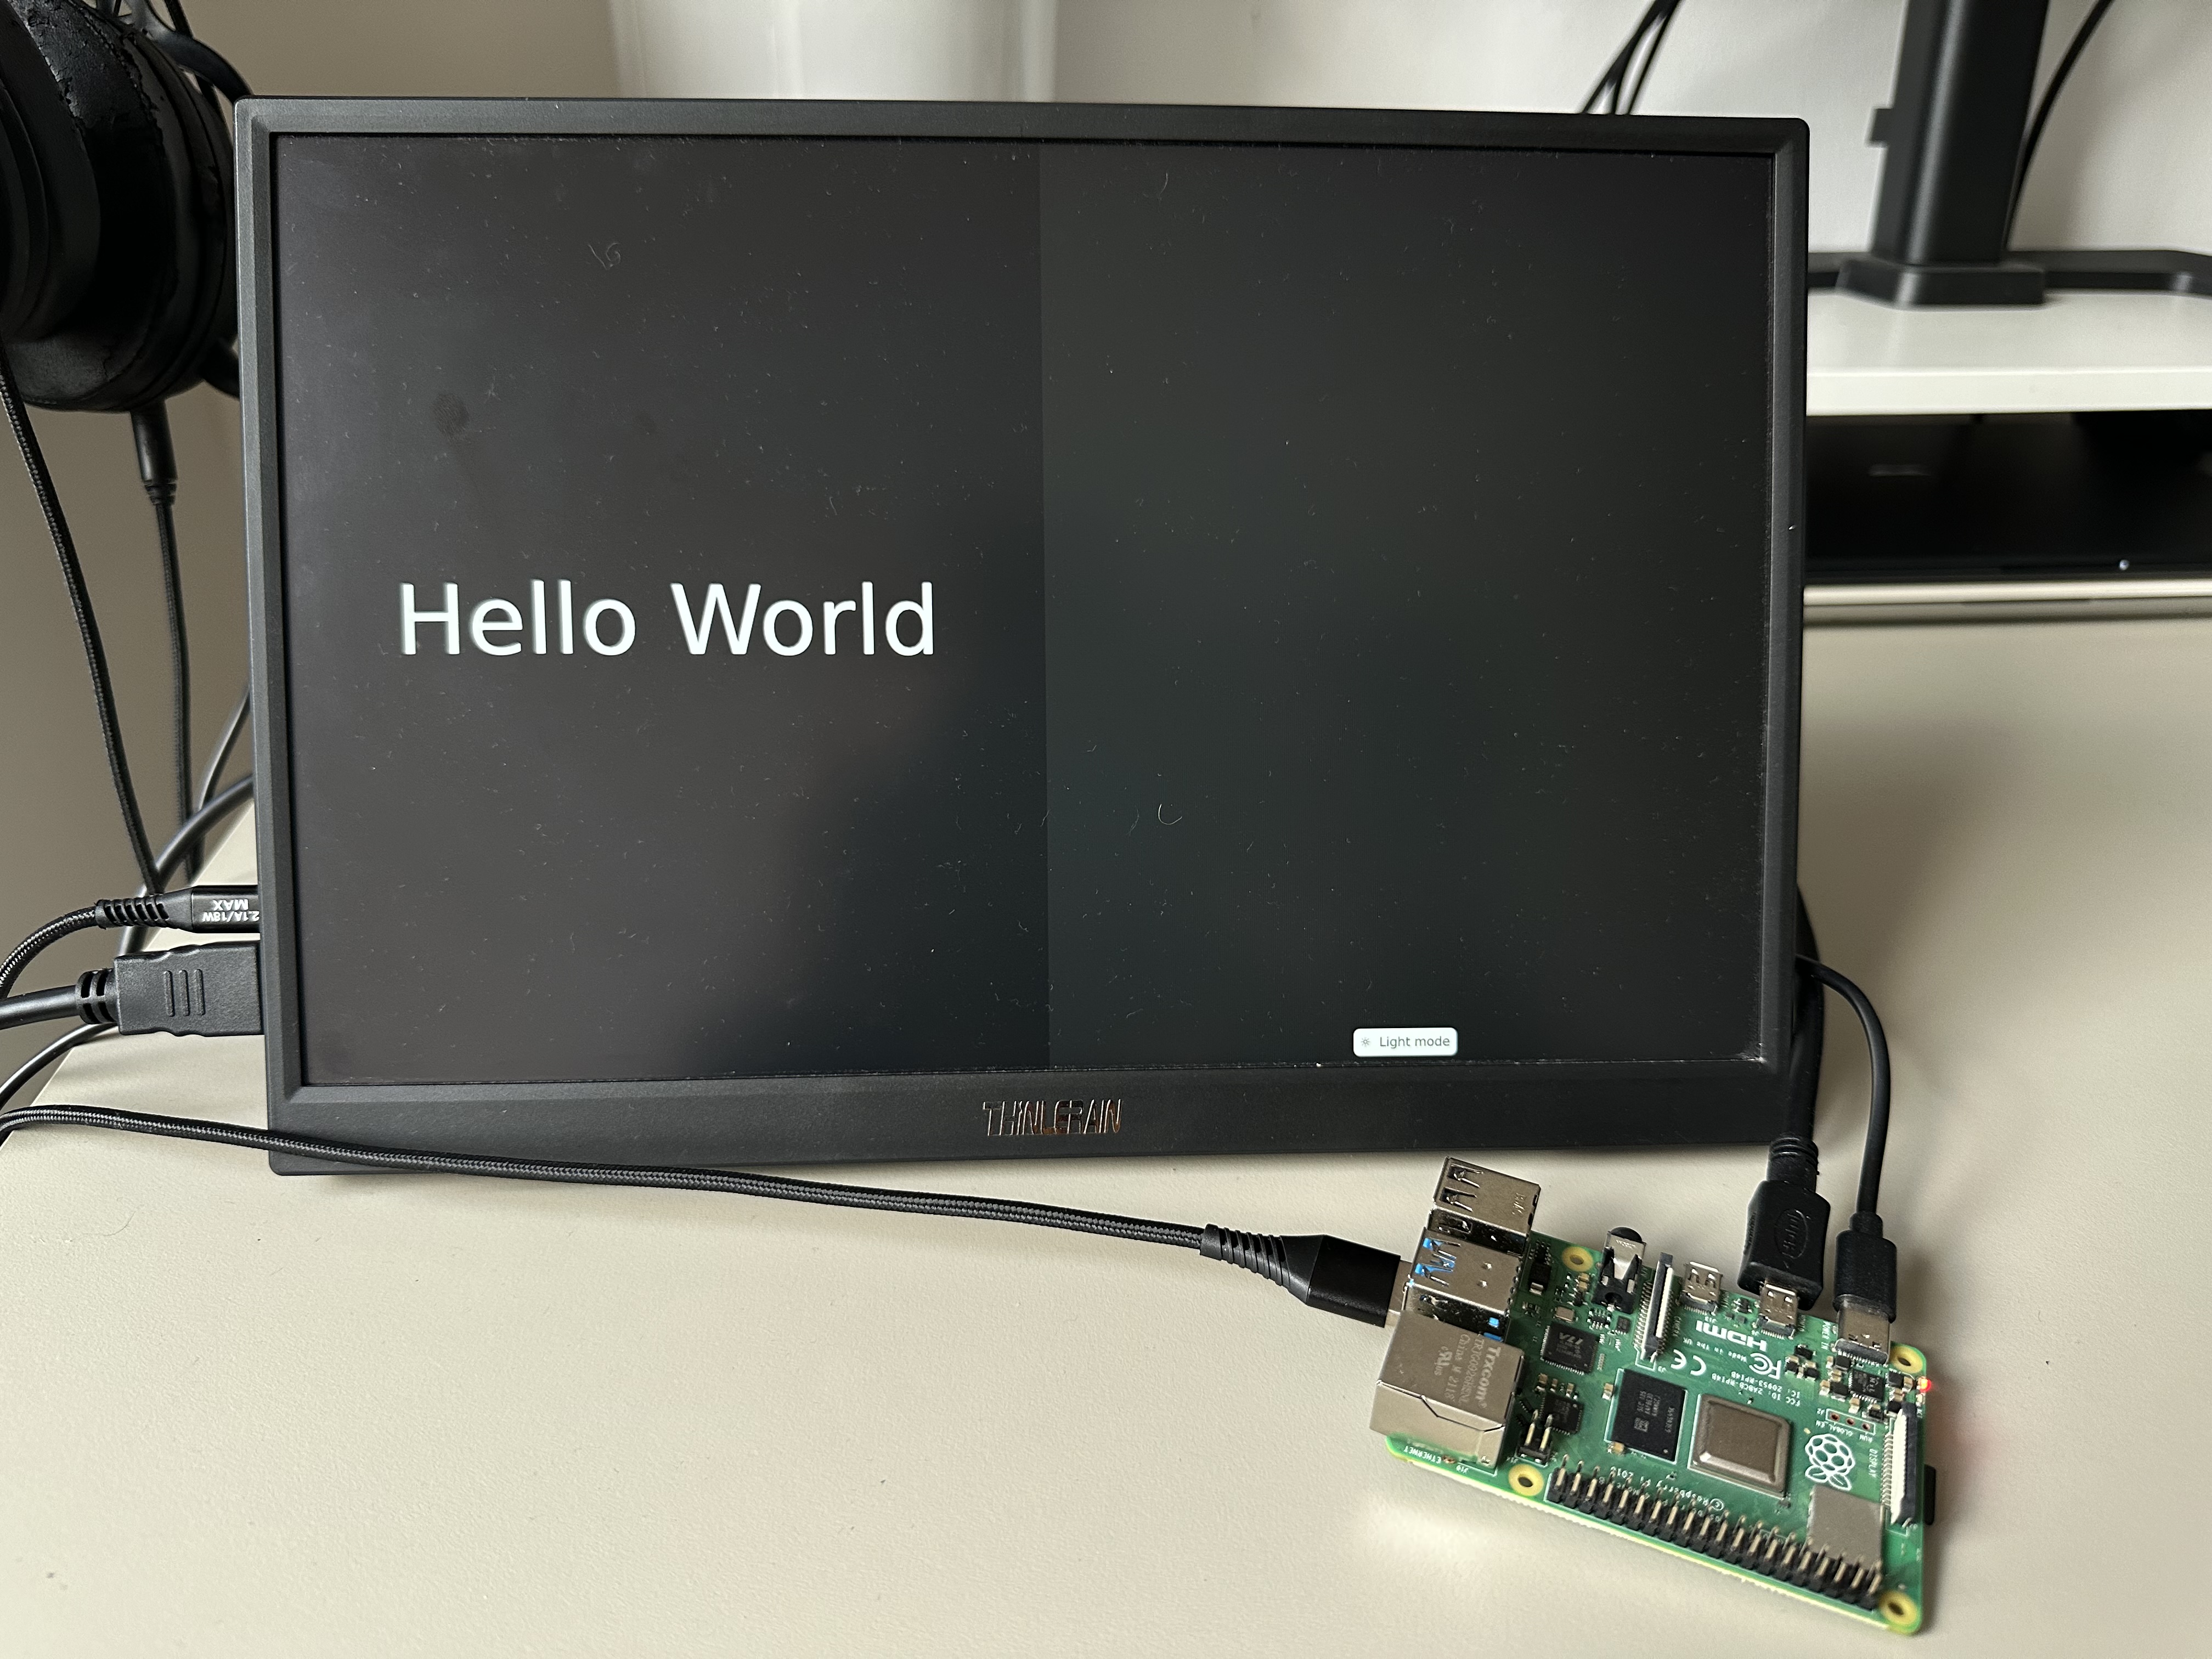
Power on a Raspberry Pi 4B. No login prompt, no desktop, no commands typed. A Qt QML application appears fullscreen, on its own, a few seconds later.
That is how a real embedded product behaves. A payment terminal, an industrial HMI panel, a car infotainment head unit, a smart thermostat - none of them boot to a shell and wait for you. They come up as the thing they are.
This post is the full path to getting there with the Yocto Project: from setting up the WSL2 build environment to a Pi running a custom Linux image with exactly one application on it. It covers the parts that worked, and rather more usefully, the parts that did not.
I am a Qt/C++ developer by trade, so the QML side of this was familiar ground. This post is only about setting up and building my own Linux distribution with Yocto.
Part 1: The build host
Why WSL2 instead of a virtual machine
My previous run at Yocto used Ubuntu inside VirtualBox. This time I went with WSL2, and the reasoning is worth spelling out because it is specific to what Yocto actually does.
A traditional VM emulates a full virtual disk controller. Every single file operation crosses that emulation layer. WSL2 also runs a lightweight VM under the hood, but with a much thinner, purpose-built hypervisor (the Virtual Machine Platform) and a considerably shorter I/O path to disk.
Normally that difference is academic. For Yocto it is not, because BitBake performs hundreds of thousands of small file operations per build across sysroots, sstate-cache, and package metadata. Per-operation latency gets multiplied by an enormous constant. That single fact is the dominant reason WSL2 wins here.
Two secondary reasons: VMs typically pre-allocate fixed RAM and CPU counts, which artificially caps BitBake’s parallel task scheduler, whereas WSL2 shares host resources dynamically. And VMs usually run a full GUI desktop by default, which is pure overhead for a headless build.
Host specs, so the timings later mean something: Windows 11 25H2, build 26200.8737, AMD CPU with SVM enabled in BIOS, NVMe SSD with about 1 TB free.
The filesystem trap that catches everyone in WSL2
WSL2 solves the VM-level I/O problem above, but it has a very similar trap built into itself, one level down. This is the single most important thing to get right when combining WSL and Yocto.
WSL2’s Linux kernel manages its own native virtual disk - a real ext4 filesystem inside a .vhdx file. Access from ~/... is native, with no translation. Fast.
Windows drives are also reachable from Linux, via /mnt/c/.... But that path crosses an interop layer into NTFS. It is slower, and dramatically so for workloads made of enormous numbers of small file operations. Which is exactly what Yocto is.
The rule: never put your Yocto project or build directory under /mnt/c/. Always use the native Linux filesystem, for example ~/yocto/ - both Microsoft and the Yocto Project itself warn against it.
Installing Ubuntu
1
2
wsl --list --online          # confirm the exact distro name string
wsl --install -d Ubuntu-24.04
Small gotcha on first boot: I tried admin as the username, then root. Both were rejected as already existing, because some names collide with accounts baked into the base image and its first-boot provisioning. I settled on wsl-yocto.
Second small gotcha: the shell drops you at /mnt/c/Users/<name> - the slow NTFS mount. That is WSL’s default starting directory, not an error. Confirm your real home with:
1
2
cd ~
pwd     # /home/wsl-yocto
That is the fast native ext4 path to work from.
Then the usual:
1
2
sudo apt update
sudo apt upgrade
Choosing the Yocto release
The newest release at the time was Wrynose (6.0.1). I chose Scarthgap (5.0.x) instead - the LTS. Wrynose is very new, which means less documented and less battle-tested by the community. For a project other people are meant to follow along with, mature and well-documented beats new every time.
The Scarthgap system requirements page confirmed two things:
- Section 1.3, Supported Linux Distributions: Ubuntu 24.04 is supported. Matches what I already had installed.
- Section 1.4, Required Packages for the Build Host: a single combined
apt installlist. Scarthgap trimmed this down compared to older releases, with no separate GUI or documentation package groups needed for a basic headless build.
1
2
3
sudo apt install build-essential chrpath cpio debianutils diffstat file gawk gcc git \
iputils-ping libacl1 liblz4-tool locales python3 python3-git python3-jinja2 python3-pexpect \
python3-pip python3-subunit socat texinfo unzip wget xz-utils zstd
Three of those are worth knowing by name rather than blindly installing:
- chrpath rewrites the RPATH/RUNPATH baked into cross-compiled binaries so they point at correct paths on the target, not on the build machine.
- cpio is an archive tool used internally for some packaging and initramfs steps.
- debianutils provides small Debian/Ubuntu utility scripts that other tooling expects to exist.
The same page also links an official “Setting Up to Use Windows Subsystem For Linux (WSL 2)” section, which is where I found the next item.
The WSL2 disk bloat problem
The .vhdx backing file grows automatically as data is added. It does not automatically shrink when you delete files from inside Linux.
Yocto builds get created and torn down repeatedly while learning, so this causes very real disk bloat over time. The fix runs on the Windows side, not in Linux:
wsl --shutdownto release the file- Compact the
.vhdxwithOptimize-VHD(Hyper-V PowerShell module) or manually viadiskpart
Treat it as recurring maintenance, not a one-time setup step.
Editing files from Windows
VS Code with the WSL extension is the right answer. The UI window renders on Windows, but a VS Code Server process runs inside WSL2, so file access, the integrated terminal, and extensions all run natively on Linux with no translation penalty. That makes it safe to edit files living under ~/ without giving up the performance you just went to the trouble of getting.
Windows Explorer can also browse into the WSL filesystem via \\wsl$ (or \\wsl, depending on version). Useful for occasional drag and drop, but not the primary workflow. More on why later, because it turned out to be surprisingly slow.
What to back up, and what not to
Yocto builds are, for the most part, reproducible from source. Given the same layers, the same local.conf, and the same pinned recipe revisions, BitBake can regenerate the entire build/ directory from scratch. And build/ gets big: 50 to 100 GB is normal once you have generated sysroots, sstate-cache, and temporary packages.
So: do not back up the build directory. Instead put the actual authored content under version control - your custom layers, your local.conf, your recipe customizations. Treat build/ as disposable.
This maps directly onto Yocto’s own philosophy: build/ is disposable, meta-* layers are the source of truth. (wsl --export and wsl --import exist for full distro-level backup and restore, but that is overkill compared to just version-controlling what matters.)
Part 2: Poky, the BSP layer, and a first build
Choosing the target machine
The BSP layer for the Pi is meta-raspberrypi. It has a scarthgap branch, and the branch name is itself the compatibility signal - no separate compatibility table to consult.
Its conf/machine/ directory lists the available machine identifiers. For the Pi 4B there are two candidates:
raspberrypi4.conf- 32-bit (armv7/armhf)raspberrypi4-64.conf- 64-bit (aarch64/arm64)
I went with raspberrypi4-64. It is the modern default, matches current Raspberry Pi OS, addresses more RAM cleanly, and is what current tutorials assume. The 32-bit variant mostly exists for legacy peripheral and driver compatibility, which is much less relevant now.
Cloning Poky
Poky is the Yocto Project’s reference distribution: a pinned combination of BitBake plus OpenEmbedded-Core plus a default configuration, meant as the working scaffold you clone and then customize.
The canonical repository is git.yoctoproject.org. GitHub’s yoctoproject/poky is an official mirror, not the primary source.
1
2
cd ~
git clone -b scarthgap https://git.yoctoproject.org/poky
Clean clone into ~/poky, roughly 223 MB and 6491 files. Verified:
1
2
3
4
cd ~/poky
git branch          # * scarthgap
git log -1 --oneline
# <commit hash> (HEAD -> scarthgap, origin/scarthgap) <latest commit message>
HEAD matching origin/scarthgap exactly, no drift, correct branch confirmed. The exact hash will differ by the time you clone - scarthgap is a maintained LTS branch, so it keeps moving. I ended up doing this same check after every clone in the project, and recommend the habit.
One footnote for anyone reading newer material: the Yocto Project is in the process of moving the poky repo’s master/dev branch away from being the primary path forward, toward a newer bitbake-setup tool with separate bitbake and oe-core clones. This does not affect LTS branches like scarthgap, which continue to be maintained the traditional way. If you see a newer post describing a different setup method, that is why.
Cloning meta-raspberrypi
Layers are independent, standalone repositories that sit side by side with Poky, not nested inside it. Poky already bundles several internal layers (meta, meta-poky, meta-yocto-bsp), but external layers get added the same way any additional layer would: as a sibling directory, referenced in rather than physically merged in.
1
2
cd ~
git clone -b scarthgap https://github.com/agherzan/meta-raspberrypi.git
So ~/poky and ~/meta-raspberrypi are siblings. Same branch and commit verification as before.
Initializing the build environment, and why source matters
1
2
cd ~/poky
source oe-init-build-env
Not ./oe-init-build-env, not bash oe-init-build-env. Here is why, and it is one of those Unix fundamentals that bites people who half-know it:
Running a script normally executes it in a child process. Any cd it performs or environment variable it exports dies with that child when it exits. source (or its POSIX equivalent, . oe-init-build-env - note the space, not to be confused with ./oe-init-build-env) runs the script’s commands directly in your current shell, so its changes - adding bitbake to PATH, moving into the build directory - actually persist.
source is the proper way to run it: any other invocation runs it in that throwaway child process instead, so bitbake never actually lands on your PATH. This is exactly why the docs always show it that way.
On the first run of oe-init-build-env, it:
- created
conf/local.confandconf/bblayers.conffrom their sample templates - added a
.vscodeconfig - dropped me into
~/poky/build
build/ is where all config lives plus everything generated during a build. It is the directory we already agreed to treat as disposable.
Registering the layer, and a locale failure
Layers on disk are not auto-discovered. They must be explicitly registered in bblayers.conf, and the proper way to do that is the bitbake-layers tool rather than hand-editing:
1
bitbake-layers add-layer ~/meta-raspberrypi
Which failed:
1
2
ERROR: Unable to connect to bitbake server, or start one (server startup failures
would be in bitbake-cookerdaemon.log).
Reading the named log file (it sits in build/) gave the real cause, repeated over and over:
1
Please make sure locale 'en_US.UTF-8' is available on your system
Root cause: WSL’s minimal Ubuntu base image does not generate the en_US.UTF-8 locale by default, unlike a typical full desktop Ubuntu install or VM where it usually already exists. And here is the subtlety: having the locales package installed, which the required-packages list gave me, is not the same as having a specific locale generated. Those are two separate steps in Debian and Ubuntu’s locale system.
locale -a confirmed it, showing only C, C.utf8, and POSIX.
1
2
sudo locale-gen en_US.UTF-8      # generates the locale data
sudo update-locale               # sets the system default
(locale -a afterwards displays it as en_US.utf8, lowercase and without the dash. That is just display normalization, same locale.)
After the fix, add-layer succeeded. BitBake is often ambiguously quiet about success, so verify explicitly rather than assuming:
1
2
bitbake-layers show-layers
cat conf/bblayers.conf
The raspberrypi layer showed up at priority 9, versus 5 for the base Poky layers. BSP layers deliberately set a higher priority so they can override generic recipes with hardware-specific versions.
Setting MACHINE
1
grep MACHINE conf/local.conf
The active line was MACHINE ??= "qemux86-64" - Poky’s out-of-the-box default, a virtual x86 target for exercising the build system itself under QEMU rather than real hardware. Changed to:
MACHINE ??= "raspberrypi4-64"
Moving the caches out of the disposable directory
This is the highest-value configuration change in the whole project.
DL_DIR and SSTATE_DIR were both commented out in local.conf, defaulting to ${TOPDIR}/downloads and ${TOPDIR}/sstate-cache - that is, inside build/.
Which is a problem, because build/ is the thing we treat as freely deletable. Every wipe would also destroy every fetched source tarball and the entire shared-state build cache, forcing a complete re-fetch and rebuild from zero. Pure wasted time, for nothing.
Two gotchas while fixing it:
~does not expand inside BitBake.conffiles the way it does in bash. These files use Python-flavoured variable substitution, not shell syntax. You need the full absolute path.- I considered
${TOPDIR}/../../sstate-cache. It is valid BitBake syntax but it is backwards logic:TOPDIRis the disposable, renamable thing, so anchoring a deliberately-persistent cache to its relative position is fragile by design.
DL_DIR ?= "/home/wsl-yocto/yocto-cache/downloads"
SSTATE_DIR ?= "/home/wsl-yocto/yocto-cache/sstate-cache"
No need to create yocto-cache manually; BitBake creates it on first use.
Dry run before committing hours
1
bitbake -n core-image-minimal
-n (or --dry-run) parses the config, resolves dependencies, and plans every task without executing any of them. It is a cheap way to catch a typo’d MACHINE or a missing layer dependency before starting a multi-hour build.
Reading the output:
MACHINE = "raspberrypi4-64"- correctTARGET_SYS = "aarch64-poky-linux"- genuinely targeting 64-bit ARM, consistent with the machine choicemeta-raspberrypi = "scarthgap:6ca1f75..."- the same commit hash fromgit log, confirming the layer in use is exactly the one I cloned- A warning about WSL
.vhdxgrowth, surfaced proactively by Yocto itself. Already knew about it, already had the fix. Sstate summary: Wanted 1754 Local 0 Mirrors 0 Missed 1754 (0% complete)- concrete numbers behind the sstate discussion above. 1754 tasks could be satisfied from cache; zero currently are, because the cache is brand new. That ratio looks very different on a second build.Tasks Summary: Attempted 3729 tasks... all succeeded- remembering that in a dry run, “succeeded” means planning succeeded, not that anything was fetched or compiled.
Clean. Cleared to build for real.
The first real build
1
bitbake core-image-minimal
I had braced for anywhere from one hour on strong hardware with fast internet up to four hours or more. It finished noticeably faster than that.
core-image-minimal is deliberately the smallest reference image, with no graphical stack and minimal packages, and real time depends heavily on host CPU, disk, and internet speed. Any build time figure is meaningless without the hardware attached to it, which is why I listed my specs at the top.
Disk usage: du -sh ~/poky/build reported 38 GB.
Part 3: From build output to a booting Pi
What actually came out
1
ls -la ~/poky/build/tmp/deploy/images/raspberrypi4-64/
The interesting items:
core-image-minimal-raspberrypi4-64.rootfs-<timestamp>.wic.bz2- the flashable artifact..wicis Yocto’s disk image format.- A matching
.wic.bmapfile. A “block map” that some flashing tools use to write only the actually-occupied blocks rather than the whole image byte for byte. Not required, but nice to know it exists. - A large pile of
.dtband.dtbodevice tree and overlay files covering real Pi hardware variants and add-on boards: camera modules, audio HATs, displays. Good confirmation this build genuinely targets real Pi hardware rather than something generic. - The kernel image, a kernel modules tarball, and the rootfs in several formats (
.ext3,.tar.bz2,.wic.bz2).
Getting the image out of WSL2
Here is an architectural fact that surprises people: WSL2 has no direct access to physical USB devices by default. It runs as an isolated lightweight VM with its own kernel, and Windows owns and manages all physical hardware, including USB card readers. It does not automatically expose them into the Linux VM.
The proper general-purpose fix is usbipd-win, Microsoft’s official USB/IP project for attaching specific USB devices from Windows into WSL2 over a virtual USB/IP protocol.
I did not need it. Only a single ~27 MB file had to move, not a live block device, so copying the .wic.bz2 out of WSL2 into Windows and flashing from there sidesteps the whole problem.
1
2
cp tmp/deploy/images/raspberrypi4-64/core-image-minimal-raspberrypi4-64.rootfs-<timestamp>.wic.bz2 \
   /mnt/c/Users/<username>/Downloads/
Now it’s just a matter of flashing it to the Raspberry Pi.
Flashing
Raspberry Pi Imager accepted the .bz2 directly. Useful fallback knowledge gathered in case it had not: balenaEtcher and USBImager both explicitly support reading .bz2 compressed images, along with .gz, .xz, and .zip. And manual decompression is always an option (bzip2 -d in WSL, or 7-Zip on Windows) to get a plain .wic.
First boot
Flashed, inserted, powered on. First custom Yocto image running on real target hardware. Core milestone of the whole project.
Part 4: Getting Qt into the image
With a booting minimal image proven, the real goal began. I scoped it as four phases up front:
- Get Qt into the Yocto build
- Understand how Qt renders fullscreen with no X11, no Wayland, no window manager
- Package the application as a proper Yocto recipe in a custom layer
- Autostart on boot, fullscreen
Finding meta-qt6
The official layer is meta-qt6, maintained by The Qt Company, hosted on code.qt.io - Qt’s own self-hosted cgit instance, not GitHub. It is easy to instinctively search GitHub for it and come up empty, because it is not mirrored there under any obvious name.
Clone URL: https://code.qt.io/yocto/meta-qt6.git
meta-qt6’s branching scheme, which is genuinely confusing
Branches here are named after Qt version numbers, not Yocto codenames:
dev- Qt development branch6.x- minor stabilization branches, open source6.x.y- specific release tagslts-6.x.y- commercial-only LTS branches
The repo’s about page shows a compatibility matrix of which Qt branch has been tested (x) or declared compatible (c) against which Yocto release. Read it carefully: it is a compatibility table, not a menu of valid options for your Yocto release. Easy to misread at a glance.
Worth noting: lts-6.x with the lts- prefix is a separate, commercial-license-only branch requiring Qt Gerrit SSH access, not publicly cloneable. Plain 6.x without the prefix is the equivalent open-source stabilization branch, and it can be entirely available even when the LTS line of the same number is commercially gated.
Two reliable ways to verify things yourself rather than trusting a possibly-stale table:
- Compatibility: check
LAYERSERIES_COMPATinsideconf/layer.confon the specific branch or tag in question. If your Yocto codename appears there, it is declared compatible. - Public accessibility: just attempt the clone. If it is genuinely gated, git fails clearly and immediately with an auth error rather than silently giving you something broken.
Landing on 6.8.3
I wanted something newer than the initially safe-looking 6.5 branch. 6.8 is the latest Qt LTS - Qt 6.11 had just come out but I did not want to rely on something that new. Before cloning I verified three things:
conf/layer.confon the plain6.8branch listedscarthgapinLAYERSERIES_COMPATQT_EDITION ?= "opensource"was the default, not force-commercial- The specific tag
6.8.3resolved when browsing?h=6.8.3on cgit, rendering a real page rather than a “ref not found” error
1
git clone -b 6.8.3 https://code.qt.io/yocto/meta-qt6.git
meta-qt6’s own dependencies
From its README:
- openembedded-core - already satisfied, since Poky bundles it as the
metafolder inside~/poky - meta-openembedded - not present, needed
- meta-clang - optional, skipped, only relevant if using Clang instead of GCC
1
git clone -b scarthgap https://github.com/openembedded/meta-openembedded.git
Important structural fact: meta-openembedded is not a single layer. It is a large repository bundling multiple separate sub-layers as subfolders: meta-oe, meta-python, meta-multimedia, meta-networking, meta-gnome, meta-xfce, meta-webserver, meta-filesystems, meta-perl, meta-initramfs, and more. You activate only the specific sub-layers you need, not the whole thing.
Which sub-layers? Read LAYERDEPENDS
meta-qt6/conf/layer.conf answers it directly, in a variable distinct from the LAYERSERIES_COMPAT I checked earlier:
LAYERDEPENDS_qt6-layer = "core openembedded-layer meta-python"
core- openembedded-core, already satisfied via Pokymeta-python- folder name matches layer name, straightforwardopenembedded-layer- matches no folder name at all
Folder names and layer names are not the same thing
In Yocto, each layer declares its own name inside conf/layer.conf. That name does not have to match the folder it lives in - and often does not.
meta-oe calls itself openembedded-layer. meta-qt6 calls itself qt6-layer. When in doubt, the real name is always in conf/layer.conf, under BBFILE_COLLECTIONS.
Adding the layers
1
2
3
bitbake-layers add-layer meta-openembedded/meta-oe
bitbake-layers add-layer meta-openembedded/meta-python
bitbake-layers add-layer meta-qt6
On ordering: functionally it does not matter. BitBake resolves all LAYERDEPENDS together at parse time, reading every active layer as a whole rather than sequentially as they are added. Practically it is still tidier to add dependencies before dependents, avoiding a confusing (though harmless) unmet-dependency warning mid-process.
Final state:
1
2
3
4
5
6
7
8
layer                 path                                                  priority
core                  /home/wsl-yocto/poky/meta                             5
yocto                 /home/wsl-yocto/poky/meta-poky                        5
yoctobsp              /home/wsl-yocto/poky/meta-yocto-bsp                   5
raspberrypi           /home/wsl-yocto/meta-raspberrypi                      9
openembedded-layer    /home/wsl-yocto/meta-openembedded/meta-oe             5
meta-python           /home/wsl-yocto/meta-openembedded/meta-python         5
qt6-layer             /home/wsl-yocto/meta-qt6                              5
Part 5: EGLFS, or how to draw on a screen with no desktop
What EGLFS actually is
EGL is a low-level Khronos interface that connects a rendering API such as OpenGL ES to the actual native windowing or display system. It is the glue between “draw graphics” and “put pixels on a real screen”.
EGLFS is Qt’s own platform plugin that uses EGL to talk directly to the GPU and display hardware through the Linux kernel’s DRM/KMS (Direct Rendering Manager / Kernel Mode Setting) subsystem, completely bypassing X11 and Wayland.
The full chain:
1
Qt app -> Qt EGLFS platform plugin -> EGL -> GPU driver / DRM-KMS -> physical screen
No window manager. No compositor. No other graphical process at all. The application effectively becomes its own entire display server.
That is precisely why EGLFS is the standard choice for kiosks, appliances, and embedded panels: it avoids the RAM, CPU, and complexity cost of running a full desktop stack just to display one fullscreen app that owns the whole screen anyway.
The driver side was already handled
The hardware-level translation from generic Linux graphics calls to Broadcom VideoCore GPU instructions is done by Mesa, specifically its VC4/V3D driver - the modern, open-source, full-KMS approach, as opposed to the older Broadcom-proprietary fake-KMS one.
Checking meta-raspberrypi/conf/machine/raspberrypi4-64.conf:
VC4DTBO ?= "vc4-kms-v3d"
Already the default. No BSP-side changes needed. (This is the same variable choosing which .dtbo overlay gets loaded at boot, vc4-kms-v3d.dtbo versus vc4-fkms-v3d.dtbo - files I had already seen sitting in the deploy directory earlier without knowing what they were.)
PACKAGECONFIG: a recipe’s optional-feature checkboxes
New concept. PACKAGECONFIG is the mechanism recipes use to expose optional build-time feature flags. Effectively a recipe’s own checkbox list of optional backends and features.
In ~/meta-qt6/recipes-qt/qt6/qtbase_git.bb, eglfs is a real, defined option:
PACKAGECONFIG[eglfs] = "-DFEATURE_eglfs=ON,-DFEATURE_eglfs=OFF"
So far so good. The hard part was finding out what actually enables it, because it is not set manually.
Tracing the conditional
Further down the same recipe:
PACKAGECONFIG_GRAPHICS ?= "\
    ${@bb.utils.filter('DISTRO_FEATURES', 'vulkan', d)} \
    ${@bb.utils.filter('DISTRO_FEATURES', 'wayland', d)} \
    ${@bb.utils.contains('DISTRO_FEATURES', 'opengl', \
        bb.utils.contains('DISTRO_FEATURES', 'x11', 'gl', 'kms gbm gles2 eglfs', d), 'no-opengl', d)} \
That nested bb.utils.contains is dense, so translated into plain Python-ish pseudocode:
1
2
3
4
5
6
7
if 'opengl' in DISTRO_FEATURES:
    if 'x11' in DISTRO_FEATURES:
        enable "gl"                        # desktop OpenGL, assumes X11 present
    else:
        enable "kms gbm gles2 eglfs"       # the EGLFS path we want
else:
    enable "no-opengl"                     # OpenGL disabled entirely
So EGLFS is not something you switch on directly. It is what you get when OpenGL is enabled and X11 is not.
Checking the real value
DISTRO_FEATURES is not normally set in local.conf. It comes from the distro policy file, referenced via DISTRO ?= "poky", which local.conf can append to but does not define from scratch.
Rather than hunting through files by hand, BitBake has a variable-inspection tool that prints the final, fully-resolved value of any variable after all layers and configs are merged, via a lightweight parse rather than a full build:
1
bitbake -e core-image-minimal | grep ^DISTRO_FEATURES=
Result:
1
2
3
DISTRO_FEATURES="acl alsa bluetooth debuginfod ext2 ipv4 ipv6 pcmcia usbgadget usbhost
wifi xattr nfs zeroconf pci 3g nfc x11 vfat seccomp opengl ptest multiarch wayland
vulkan sysvinit pulseaudio gobject-introspection-data ldconfig"
Both opengl and x11 are present. So the build was routing into the gl branch - desktop OpenGL, assuming X11 - not the EGLFS branch, even though OpenGL itself was enabled.
My first instinct was to remove both. Re-tracing the conditional showed that removing opengl lands in no-opengl, which is the opposite of what I wanted. The correct fix is to remove only x11, keeping opengl.
Also worth noting: sysvinit in that list. It becomes extremely relevant three sections from now.
Applying the fix
DISTRO_FEATURES:remove = "x11"
:remove is a BitBake override operator that strips a specific value out of an existing space-separated list variable, without needing to edit the variable’s original definition file. I had actually seen the pattern earlier in qtbase_git.bb itself, as PACKAGECONFIG:remove:mingw32 = "openssl", and followed the hint from there.
Verified with the same inspection tool. x11 gone, opengl still there.
Then, more importantly, verified the consequence rather than just the cause:
1
bitbake -e qtbase | grep ^PACKAGECONFIG=
The result included kms gbm gles2 eglfs, exactly as the hand-traced logic predicted. linuxfb came along too, so both fullscreen-without-desktop backends end up available; which one to actually use at runtime is a separate decision made later.
Adding Qt to the image
New distinction to internalize: PACKAGECONFIG controls how a single recipe builds. A separate mechanism controls which packages land in the final image.
Two variables do that job: IMAGE_INSTALL:append (general purpose) or CORE_IMAGE_EXTRA_INSTALL (a local.conf convenience variable scoped to core-image-* images). Either works. I used the former.
IMAGE_INSTALL:append = " qtbase qtdeclarative"
qtdeclarative is there specifically because it provides QML.
1
2
bitbake -e core-image-minimal | grep ^IMAGE_INSTALL=
# IMAGE_INSTALL="packagegroup-core-boot qtbase qtdeclarative"
Dry run, then a build that died
1
bitbake -n core-image-minimal
- No errors
meta-qt6 = "6.8.3:00c3bd95..."confirming the exact Qt version and commit picked up- 5241 tasks, up from 3729 in the very first pre-Qt dry run. Qt adds real weight.
Sstate summary: Wanted 712 Local 0 Mirrors 0 Missed 712 Current 1751 (0% match, 71% complete)
That sstate line is the payoff for the earlier decision to persist SSTATE_DIR outside the disposable build directory. Current 1751 is work already satisfied from the existing cache. Wanted 712, Missed 712 is the genuinely new Qt compilation work with zero cache hits, since Qt had never been built in this cache before.
I kicked off the real build at 5:47 PM in VS Code’s integrated terminal, which then crashed, killing bitbake with it. Every sstate object generated before the crash was safely persisted in ~/yocto-cache/sstate-cache, so the restart didn’t begin from zero. Lesson: run long builds inside tmux so they survive the terminal closing.
The restarted build completed successfully.
Confirming Qt actually landed
Yocto generates a manifest listing every package installed in a built image. Useful any time you want proof rather than an assumption from a successful log:
1
cat ~/poky/build/tmp/deploy/images/raspberrypi4-64/core-image-minimal-raspberrypi4-64.rootfs.manifest | grep qt
qtbase and qtdeclarative present at 6.8.3, matching the pinned meta-qt6 version. Plus qtsvg, pulled in automatically as a dependency without being explicitly requested.
Also visible: Qt’s packages split into -plugins and -qmlplugins sub-packages rather than one bundle. Useful to know if trimming image size becomes a concern later.
Part 6: Packaging the app as a real recipe
Getting the source into a repo
My existing Qt Quick project was sitting at D:/ScytheStudio/QtHelloWorld - a Windows NTFS path, not inside WSL at all. That didn’t matter, though, because Yocto recipes don’t compile source in place: they fetch it via SRC_URI into their own working area inside the build tree, so the /mnt/ slowness concern that dominates build directory placement doesn’t apply the same way to source location.
Still, I pushed it to a real git repository rather than referencing local files with SRC_URI = "file://...". One source of truth, in version control, consistent with the durable-versus-disposable principle established at the start.
SRCREV: pinning to an exact commit
SRCREV is the standard, fixed BitBake variable name (not something you invent per project) used to pin a recipe’s git-based SRC_URI fetch to one exact commit hash rather than whatever HEAD happens to be.
It is the same mechanism visible in bitbake -e output for every other layer, for example meta-raspberrypi = "scarthgap:6ca1f75...".
What actually makes a folder a layer
Exactly one file, mechanically: conf/layer.conf. Without it, bitbake-layers add-layer will not recognise the directory at all.
The recipes-*/ folder naming is a convention rather than a hard technical requirement on its own - but it interacts directly with a real requirement inside layer.conf, which makes it effectively mandatory anyway.
meta-qthelloworld/conf/layer.conf:
BBPATH .= ":${LAYERDIR}"

BBFILES += "${LAYERDIR}/recipes-*/*/*.bb \
            ${LAYERDIR}/recipes-*/*/*.bbappend"

BBFILE_COLLECTIONS += "qthelloworld"
BBFILE_PATTERN_qthelloworld = "^${LAYERDIR}/"
BBFILE_PRIORITY_qthelloworld = "6"

LAYERDEPENDS_qthelloworld = "core qt6-layer"
LAYERSERIES_COMPAT_qthelloworld = "scarthgap"
Line by line:
BBPATHtells BitBake to also look inside this layer’s directory for shared config and class files.BBFILESis the glob pattern telling BitBake where recipe files live. This is what turns therecipes-*/<name>/<name>.bbconvention into a hard requirement. A.bbfile anywhere else, say at the layer root, simply will not match the pattern and gets silently ignored. Silently. No error.BBFILE_COLLECTIONSregisters the layer’s internal name, the same mechanism behindopenembedded-layerandqt6-layer. Here folder name and layer name happen to match, unlike themeta-oecase.BBFILE_PATTERN_<name>/BBFILE_PRIORITY_<name>are standard boilerplate. Priority 6 follows the same priority column seen inshow-layers, sitting above the base layers at 5 and below the BSP at 9.LAYERDEPENDS_<name>should list only layers your recipe actually needs something specific from - it’s tempting to addopenembedded-layerreflexively just because it’s already cloned, but that’s not a real dependency. Add layer dependencies when a real missing-dependency error demonstrates the need, not preemptively.LAYERSERIES_COMPAT_<name>declares Yocto release compatibility. Same variable I had already inspected inside meta-qt6’s own layer.conf while checking whether 6.8 supported scarthgap.
Mapping CMake concepts onto BitBake tasks
Coming from CMake, the translation is clean:
| BitBake task | CMake equivalent |
|---|---|
do_configure | cmake -B build |
do_compile | cmake --build . |
do_install | cmake --install ., but into a BitBake-controlled staging directory ${D} rather than a real system path |
${D} is BitBake’s equivalent of CMake’s DESTDIR staging concept. My existing CMakeLists.txt already had proper install(TARGETS appQtHelloWorld ... RUNTIME DESTINATION ${CMAKE_INSTALL_BINDIR}) rules, which meant do_install had something real to do with no CMake changes needed.
LICENSE is mandatory
BitBake enforces that every recipe declares a LICENSE. Not optional; the build refuses to proceed without one. This feeds Yocto’s broader license compliance and tracking system, the same system responsible for the .spdx.tar.zst manifest files I had noticed in the deploy output earlier.
I used LICENSE = "CLOSED", the correct and honest value for a private proprietary project not released under an open licence. Going open source would mean a real SPDX identifier plus LIC_FILES_CHKSUM pointing at a licence file.
S, the source root
S = "${WORKDIR}/git"
When SRC_URI fetches from git, BitBake clones into a subfolder literally named git inside the recipe’s per-recipe scratch directory. S tells BitBake where the actual project root - the one containing CMakeLists.txt - lives. Correct as-is here, since CMakeLists.txt sits at the true root of my repo rather than nested.
Plain cmake is not enough for Qt6
inherit cmake does not know how to help find_package(Qt6 REQUIRED COMPONENTS Quick) locate Qt6’s CMake config files inside Yocto’s cross-compilation sysroot. Compiling for aarch64 while running on x86_64 is a fundamentally different problem from a normal desktop CMake build.
Looking directly at meta-qt6/classes/ turned up the answer: a dedicated qt6-cmake.bbclass, provided by meta-qt6 specifically to solve this integration problem.
inherit qt6-cmake
DEPENDS, and a question that answered itself
I wondered whether a separate “Qt Quick” recipe existed to depend on, since CMakeLists.txt requests the Quick component. Listing ~/meta-qt6/recipes-qt/qt6/ directly confirmed there is no qtquick recipe, because upstream Qt bundles QtQuick and QtQml inside the single qtdeclarative module. So DEPENDS = "qtbase qtdeclarative" was already complete.
Part 7: Debugging a recipe, one task at a time
Rather than writing the recipe and firing off a full image build, I ran individual BitBake tasks in isolation for fast feedback:
1
2
3
4
bitbake -c fetch qthelloworld      # just clone SRC_URI at the pinned SRCREV
bitbake -c unpack qthelloworld     # confirm source lands correctly at ${S}
bitbake -c compile qthelloworld    # do_configure + do_compile
bitbake -c install qthelloworld    # do_install
Each -c <task> runs only that task and its dependencies for one recipe. Far cheaper than a full image build for catching mistakes early, and philosophically the same tool family as -n and -e.
I verified each step by looking at the filesystem rather than trusting success messages:
1
find ~/poky/build/tmp/work/cortexa72-poky-linux/qthelloworld -name "appQtHelloWorld"
Bug 1: missing Qt6QuickTools
do_configure failed:
1
2
Could NOT find Qt6QuickTools (missing: Qt6QuickTools_DIR)
Qt6Quick could not be found because dependency Qt6QuickTools could not be found.
Root cause: cross-compiling Qt applications has a recurring shape. Some Qt tooling, notably qmlcachegen which pre-processes QML files during the build, must run natively on the host (x86_64), separate from the target (aarch64) libraries being linked against. Yocto models this with parallel -native recipe variants.
Fix:
DEPENDS = "qtbase qtdeclarative qtdeclarative-native"
Configure and compile both went green immediately after.
Verification of where things landed:
1
2
.../git/image/usr/bin/appQtHelloWorld    <- staged install (${D})
.../git/build/appQtHelloWorld            <- raw CMake build output (expected, not staged)
Into the image
IMAGE_INSTALL:append = " qtbase qtdeclarative qthelloworld"
Rebuild was fast, since sstate-cache was warm and only 10 to 20 new tasks needed rerunning. Confirmed via the manifest again.
Part 8: First run on hardware, and two things that looked broken
Flashed, booted, and ran manually:
1
appQtHelloWorld -platform eglfs
Why -platform eglfs is required: Qt does not automatically choose EGLFS just because it was compiled in as an available PACKAGECONFIG option. It has to be explicitly selected at runtime, because Qt’s default platform detection does not reliably land on EGLFS on a system with no X11 and no Wayland.
It launched fullscreen. The EGLFS chain worked end to end. And two problems appeared immediately.
Problem 1: tofu boxes instead of text
Every string rendered as empty rectangles.
Cause: core-image-minimal ships with zero font packages. A genuinely minimal image has no GUI, so it has no reason to include fonts.
Fix:
IMAGE_INSTALL:append = " qtbase qtdeclarative qthelloworld ttf-dejavu-sans"
ttf-dejavu-sans comes from meta-oe, which was already an active layer. It is a standard, permissively licensed default in Yocto and Qt tutorials. Rebuilt, reflashed, text rendered.
Problem 2: a mouse cursor on a kiosk device
A kiosk device shouldn’t show a mouse cursor. Fix: a Qt/EGLFS-specific environment variable:
1
QT_QPA_EGLFS_HIDECURSOR=1 appQtHelloWorld -platform eglfs
Both fixes confirmed working together on real hardware.
Part 9: Autostart
Attempt 1: systemd
I built the systemd approach first, since that’s what a modern Linux system uses: a qthelloworld.service unit, wired into the recipe with inherit qt6-cmake systemd and SYSTEMD_SERVICE:${PN}. bitbake -c install qthelloworld reported success, but the service file was nowhere in the staged output - success message, missing file, no error.
The do_install log revealed why: rm_systemd_unitdir, part of the systemd bbclass itself, actively deletes the systemd unit directory whenever the image’s DISTRO_FEATURES doesn’t include systemd. This image uses sysvinit, Poky’s default init policy - not a bug, just a mismatch between my approach and the image’s actual init system.
Decision: switching the whole image over to systemd is a much larger change than one autostart app justifies. I stuck with sysvinit and wrote the native equivalent.
Attempt 2: a sysvinit init script
~/meta-qthelloworld/recipes-apps/qthelloworld/files/qthelloworld:
1
2
3
4
5
6
7
8
9
10
11
12
13
14
15
16
17
18
19
20
21
22
23
24
25
26
27
28
29
30
31
32
#!/bin/sh
### BEGIN INIT INFO
# Provides:          qthelloworld
# Required-Start:    $remote_fs $syslog
# Required-Stop:     $remote_fs $syslog
# Default-Start:     5
# Default-Stop:      0 1 6
# Short-Description: Qt Hello World Application
### END INIT INFO

export QT_QPA_EGLFS_HIDECURSOR=1

case "$1" in
  start)
    echo "Starting qthelloworld"
    start-stop-daemon --start --background --exec /usr/bin/appQtHelloWorld -- -platform eglfs
    ;;
  stop)
    echo "Stopping qthelloworld"
    start-stop-daemon --stop --exec /usr/bin/appQtHelloWorld
    ;;
  restart)
    $0 stop
    $0 start
    ;;
  *)
    echo "Usage: $0 {start|stop|restart}"
    exit 1
    ;;
esac

exit 0
The restart case just calls stop then start in sequence, giving the script the conventional start/stop/restart interface expected of an init script - it’s there for manual invocation, not automatic recovery. One honest gap: sysvinit does not auto-restart crashed processes the way systemd’s Restart=always does, and I did not build crash recovery here.
The final recipe
SUMMARY = "Qt Hello World QML application"
LICENSE = "CLOSED"

SRC_URI = "git://github.com/mateusz-fejcher7/QtHelloWorld.git;protocol=https;branch=main \
           file://qthelloworld"
SRCREV = "74e09623f1b0841dfdc51e23b97bded78180ad16"

S = "${WORKDIR}/git"

inherit qt6-cmake update-rc.d

DEPENDS = "qtbase qtdeclarative qtdeclarative-native"

INITSCRIPT_NAME = "qthelloworld"
INITSCRIPT_PARAMS = "start 99 5 . stop 20 0 1 6 ."

do_install:append() {
    install -d ${D}${sysconfdir}/init.d
    install -m 0755 ${WORKDIR}/qthelloworld ${D}${sysconfdir}/init.d/qthelloworld
}
Verified, and this time actually present:
1
2
3
4
bitbake -c install qthelloworld
find ~/poky/build/tmp/work/cortexa72-poky-linux/qthelloworld -path "*image*init.d*"
# .../git/image/etc/init.d
# .../git/image/etc/init.d/qthelloworld
Genuinely staged, no silent deletion, because update-rc.d’s behaviour matches the image’s actual init system.
The result
Rebuilt the full image, confirmed the manifest, flashed, powered on the Pi with no commands run at all.
The Qt QML application launched automatically, fullscreen, via EGLFS, with correct fonts and no visible cursor.
That is the goal from the top of this post, met exactly: boot the Pi, and it immediately runs my Qt application in fullscreen, the way a real embedded product behaves.
The repository
Everything above is packaged and reproducible at github.com/mateusz-fejcher7/yocto-qthelloworld-project, with all four upstream layers as pinned submodules, the custom layer, and the saved local.conf. The companion post walks through the repo structure and the build steps in detail.